
There are many reasons why you might want to rebind your keys since it allows you to change how your computer interprets each keystroke. Whether you want to reroute a broken or missing key, set up a cool keyboard layout, or trigger powerful macros on a brand-new custom keyboard, we’ll show you how to rebind keyboard keys on Windows, as well as how to remap shortcuts to a new keyboard combination.
What to know before remapping your keys
Customizing keyboard shortcuts can be a great way to level up your productivity, and the best way to do that is with Microsoft PowerToys. This method will work across both Windows 10 and Windows 11 and requires no registry edits or third-party software.
However, PowerToys is not available on Windows 7/8, so this method won’t work on those versions or older. If you’re still on Windows 7/8, we recommend you upgrade, especially while Windows 10 is still available as a free upgrade. Windows 11 Pro is also regularly available at a significant discount and brings a host of other productivity improvements for power users. But for PowerToys, you just need Windows 11 Home.
For those seeking some alternative productivity hacks, many modern keyboards or gaming mice include third-party tools for configuring more complex macros. And if you are comfortable making registry edits, you could also disable intrusive suggestions in Windows 11 for a more streamlined Windows experience. For most people, though, PowerToys is the best solution.
What is Microsoft PowerToys?
Microsoft provides a first-party solution for remapping Windows keyboard keys with PowerToys, a collection of tools designed to help Windows 10/11 users fine-tune their experience. Microsoft regularly updates PowerToys with popular third-party tweaks or customizations. This includes a Keyboard Manager where you can remap your keys, along with a Text Extractor for getting text from images and more.
PowerToys does require installation, so you’ll need administrator access, but it’s free on the Microsoft Store.
How to install PowerToys from the Microsoft Store
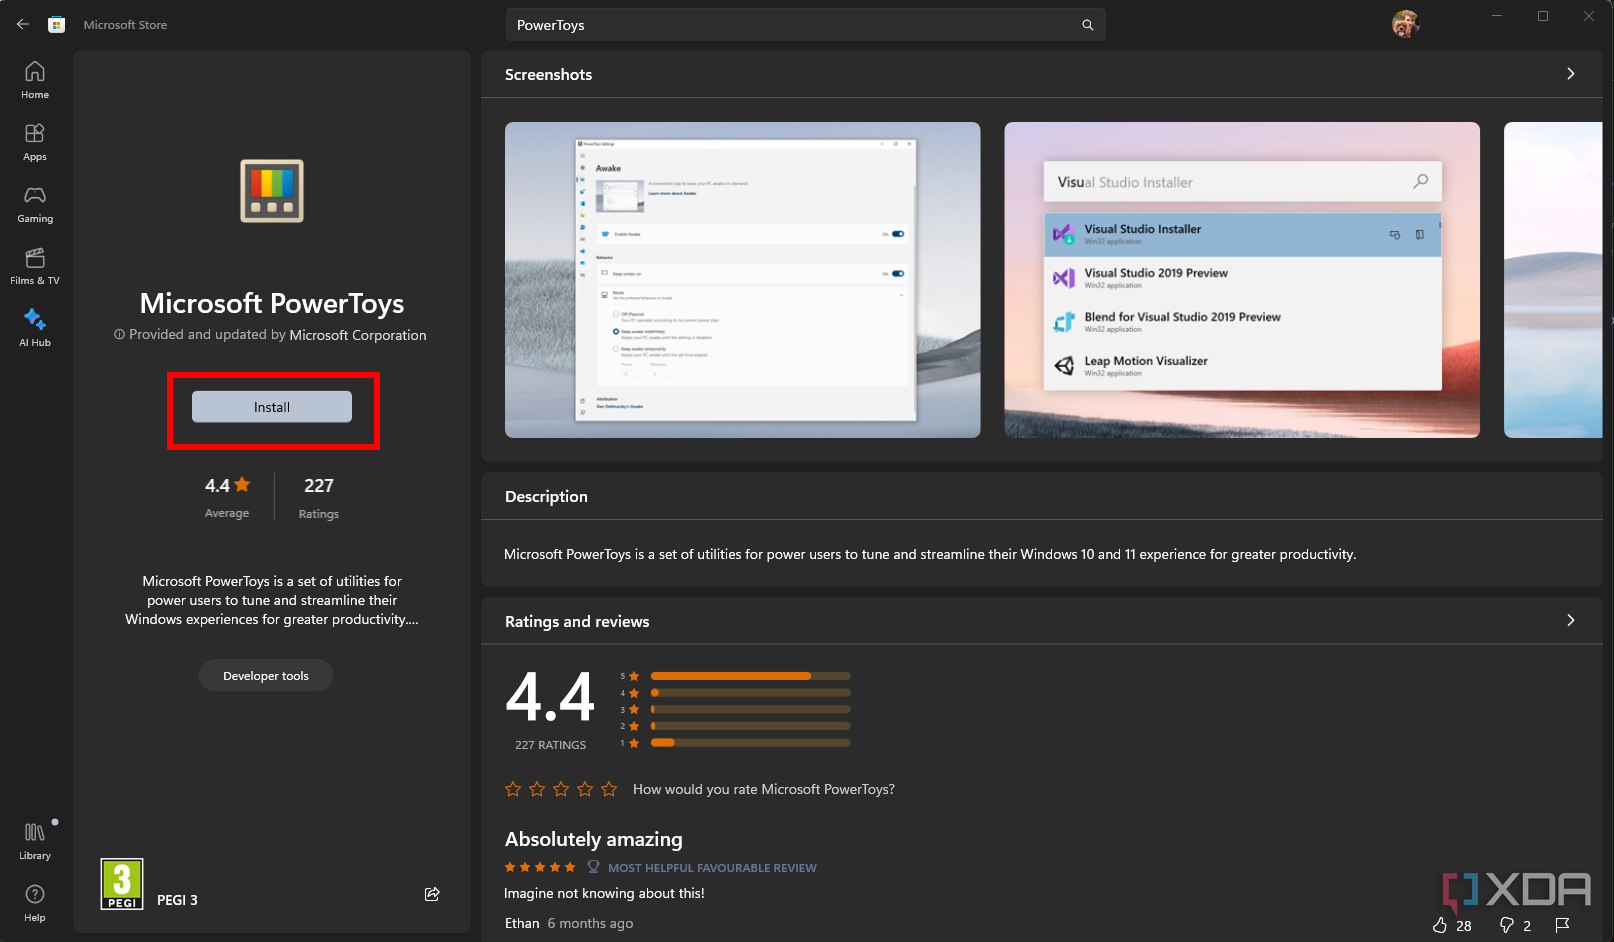
- Open the Microsoft Store by searching for it in the Start menu.
- Enter PowerToys into the top search bar and select the first result.
- Click install.

How to install PowerToys from Github
As an alternative to the Microsoft Store, you can install PowerToys from Github. This is useful when you aren’t signed in with a Microsoft account on your PC or if you want to install a previous or beta version. To install from Github, follow these steps:
- Browse to the GitHub releases page for Microsoft PowerToys.
- Locate the release version you want. You may find it easier to browse releases by tag. To do this, select Tags at the top.
- Under Installer Hashes, download the executable file for the version you need.
- We recommend you install per user.
- Make sure you select the correct architecture for your PC. If you’re unsure, download the x86 version.
- Once downloaded, open the executable and follow the installer’s instructions.
How to use PowerToys to remap keys
PowerToys includes a whole feature suite designed to help improve your Windows experience, so there’s plenty to play around with, including remapping keys. Once you’re in PowerToys, follow the steps below to set up a basic keyboard binding:
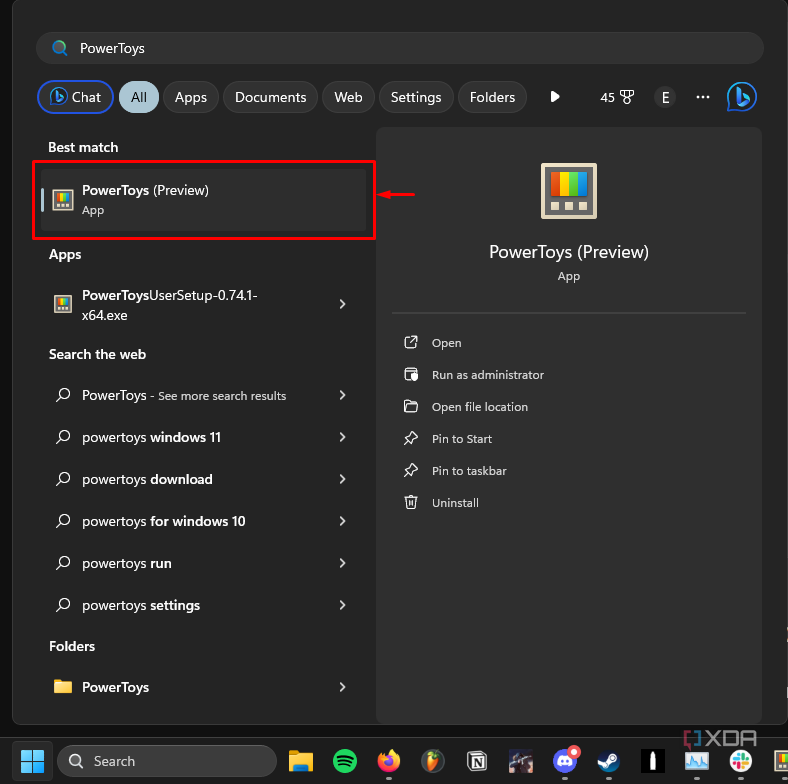
- Open PowerToys.
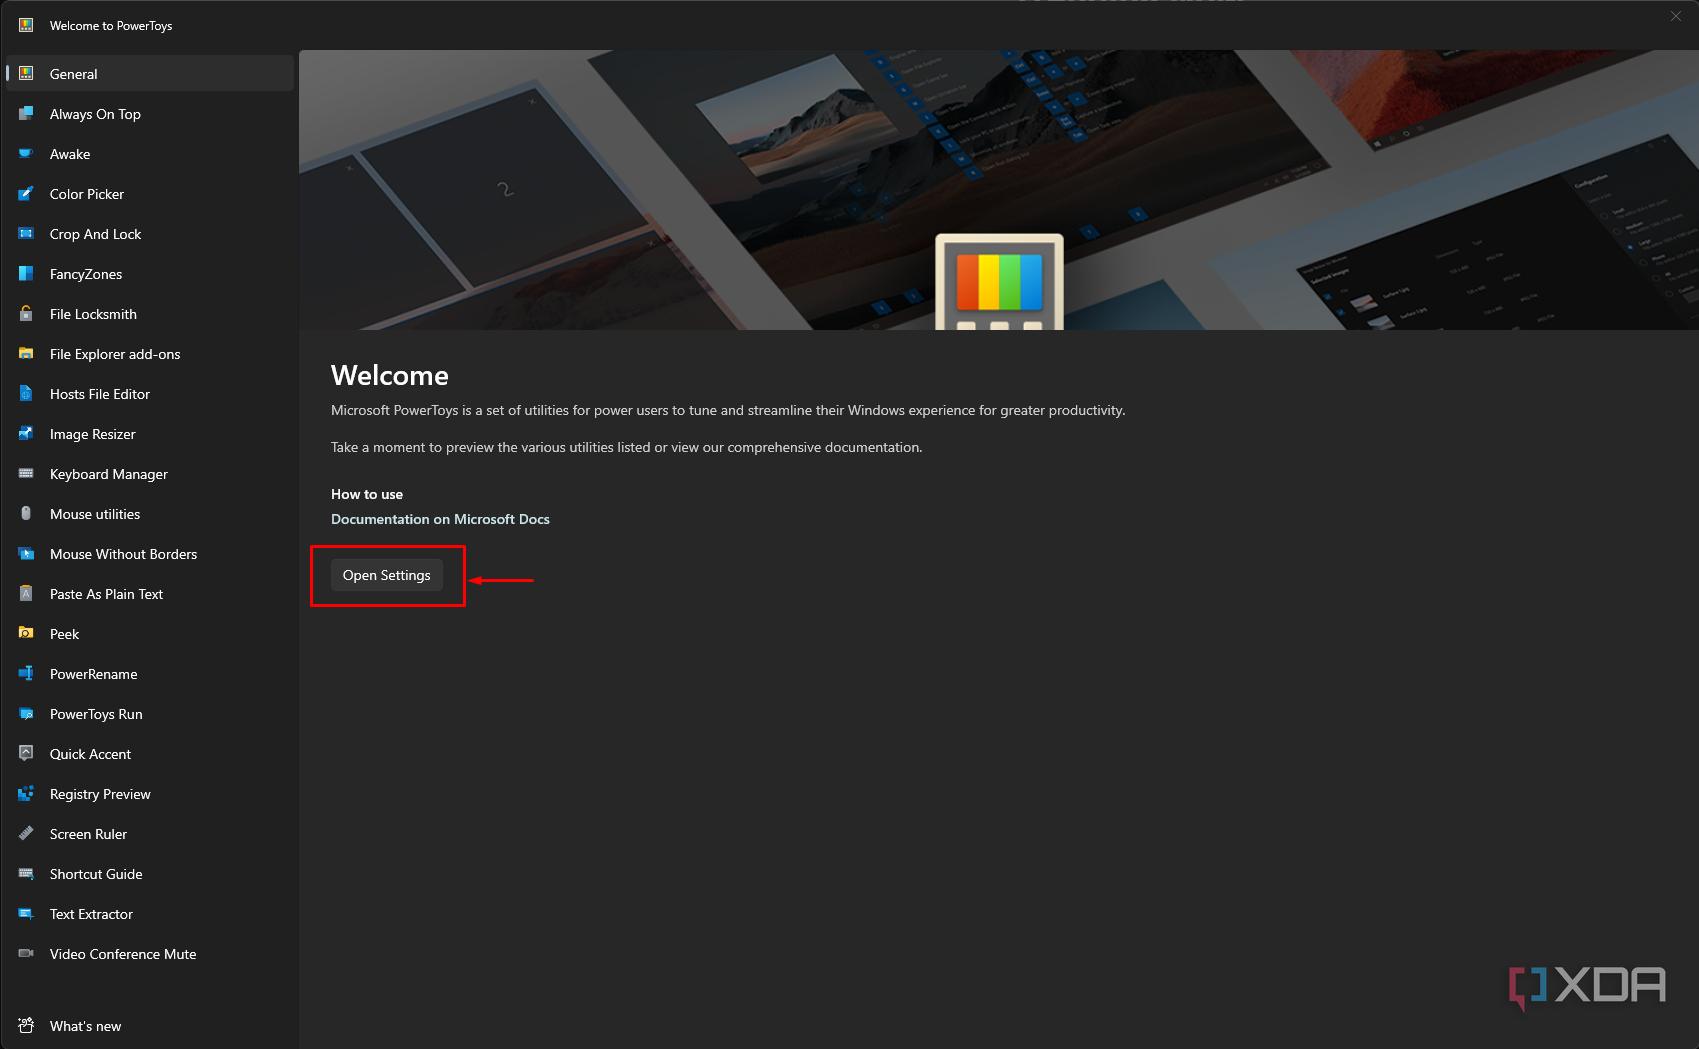
- Click Open Settings to enter the main interface.
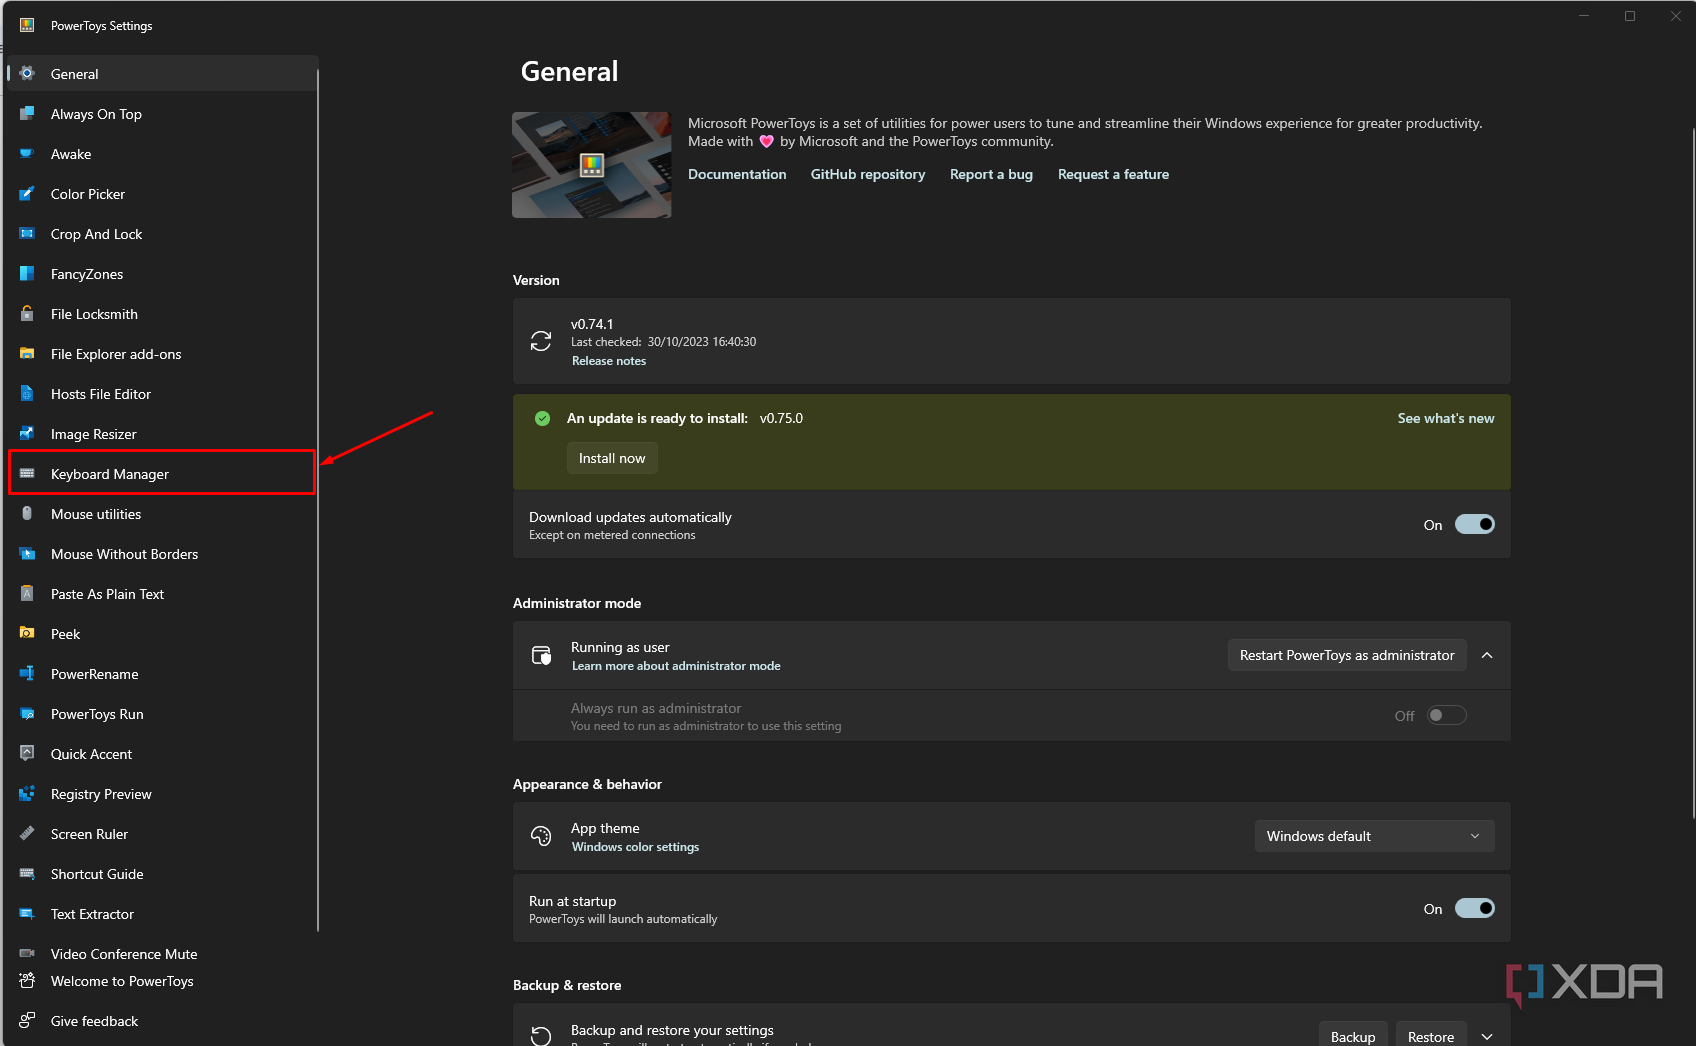
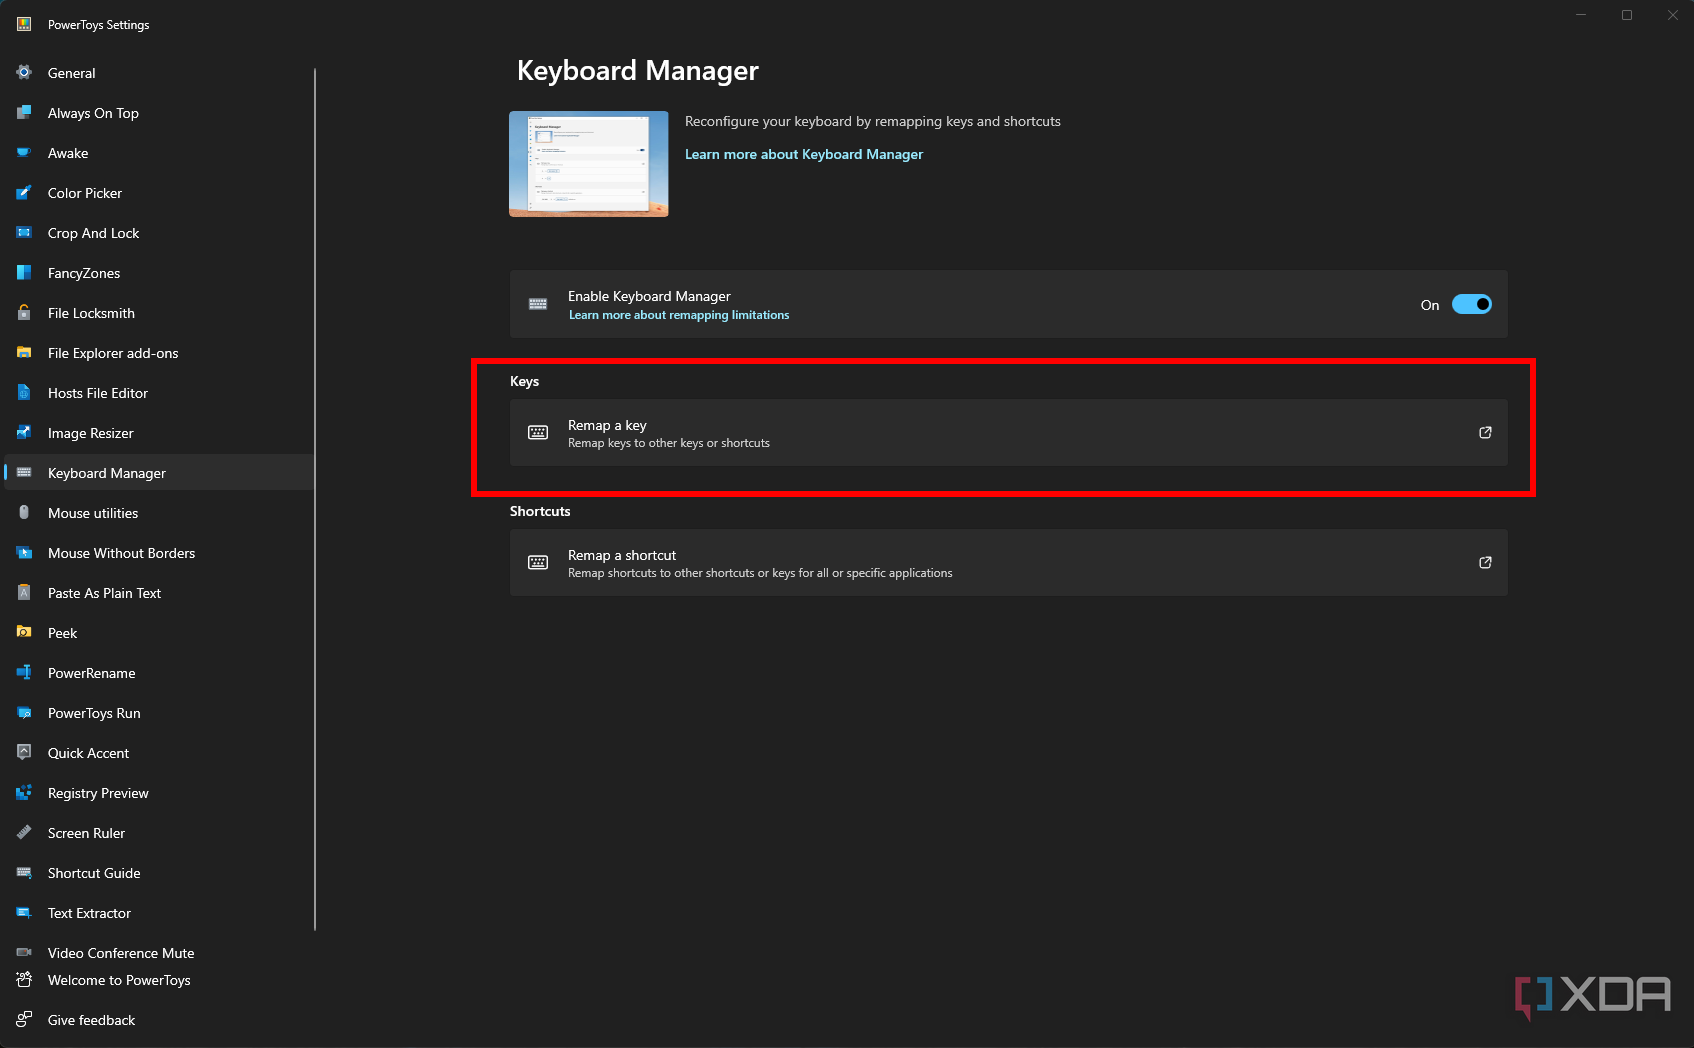
- Select Keyboard Manager in the PowerToys sidebar.
- Verify that the Enable Keyboard Manager toggle is enabled. (It should be on by default.)
- Select Remap a Key.
- Select the + (plus) key from the newly opened window.
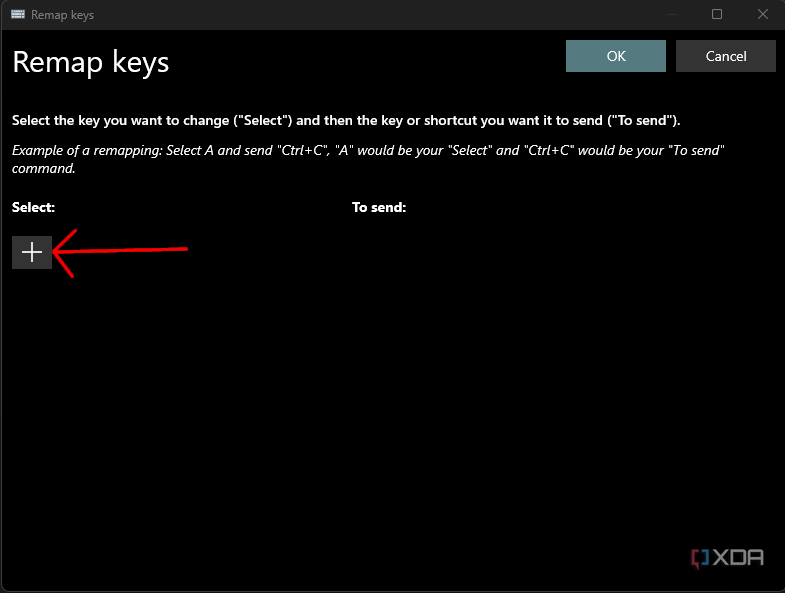
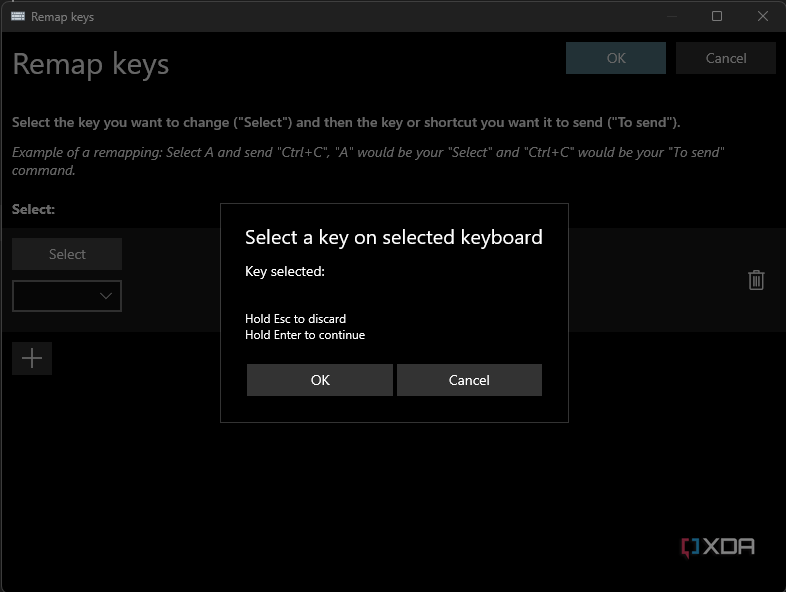
- Click Select on the left and right-hand side boxes.
- Choose the key to remap and the key to press. You can also select the key from the dropdown menu.
- Add a new row with two boxes labeled Select.
- Enter a key to remap (left) and a target (right) by scrolling through the menu or by pressing the key on your keyboard.
- Click OK in the top right-hand corner of the window once to save your changes.
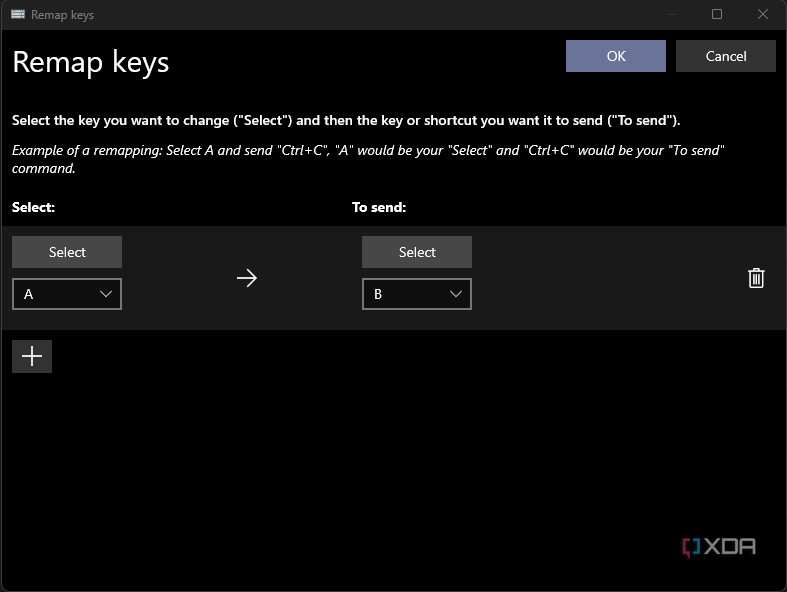
- Verify that your new keybinding has appeared in the main PowerToys Keyboard Manager window.
- Close PowerToys and try out your keybinding.


Remapping a keyboard shortcut in PowerToys
PowerToys also enables you to remap an entire keyboard shortcut. Here’s how to do that:
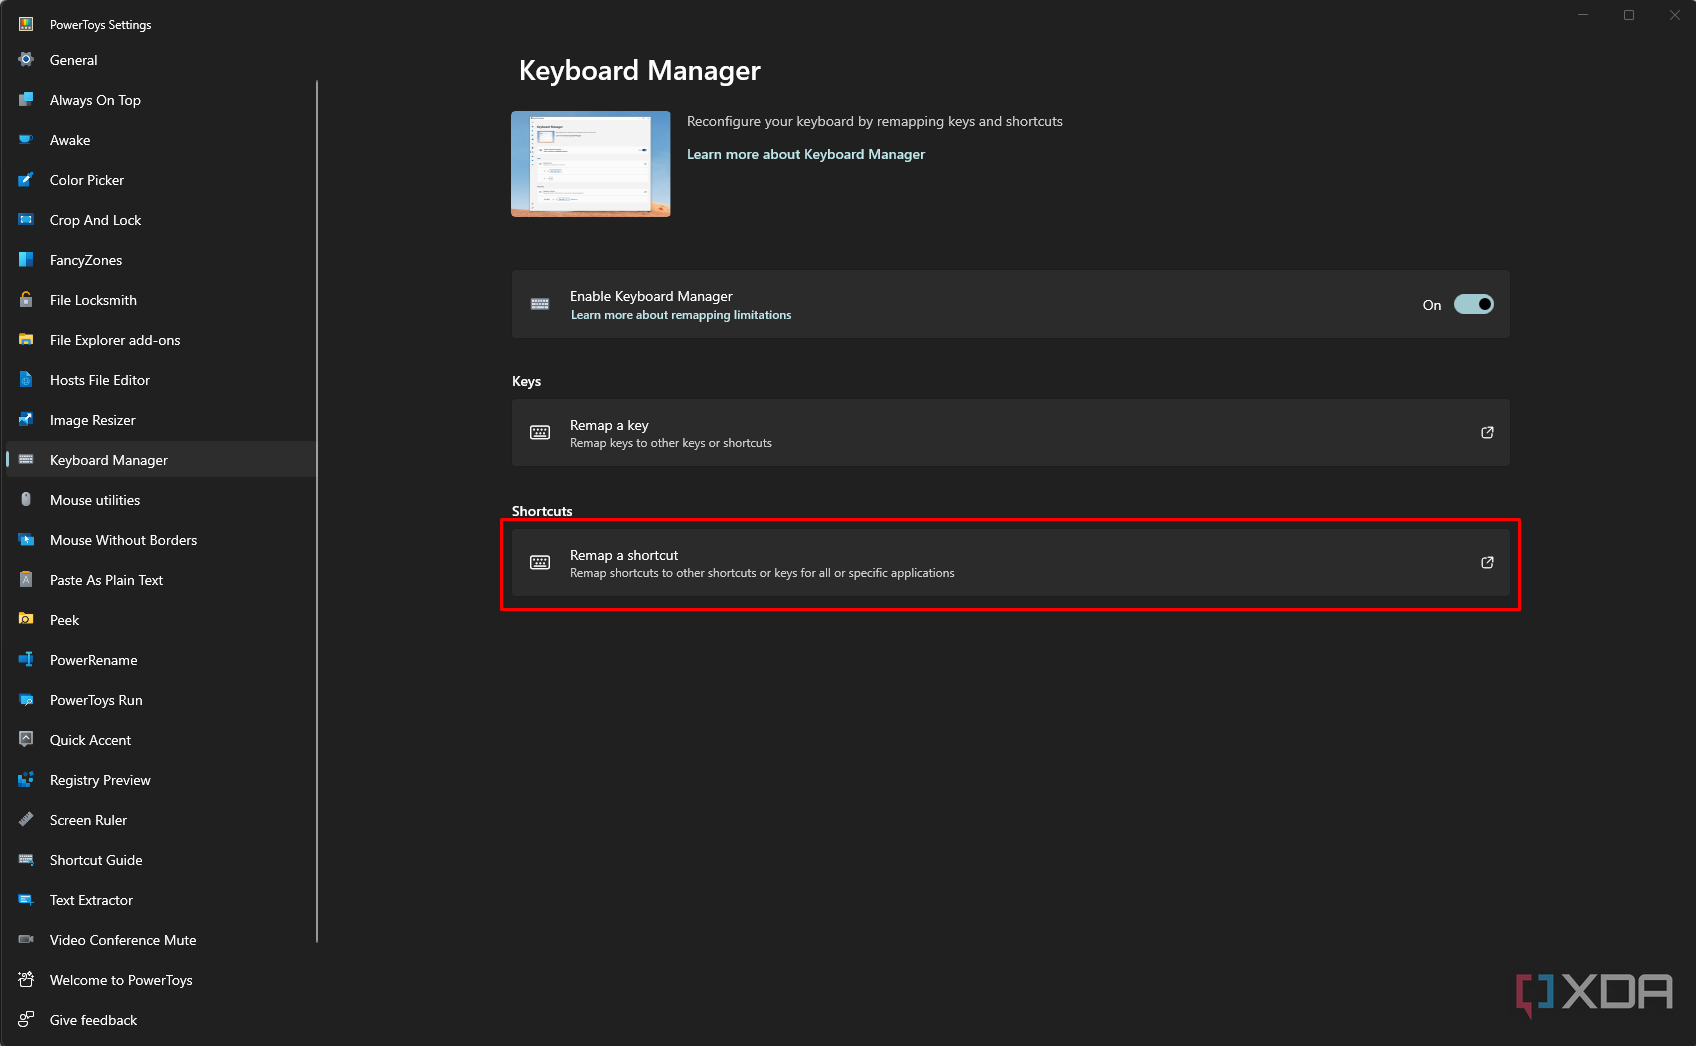
- Open PowerToys and select Keyboard Manager in the sidebar.
- Verify that the Enable Keyboard Manager toggle is enabled.
- Select Remap a shortcut.
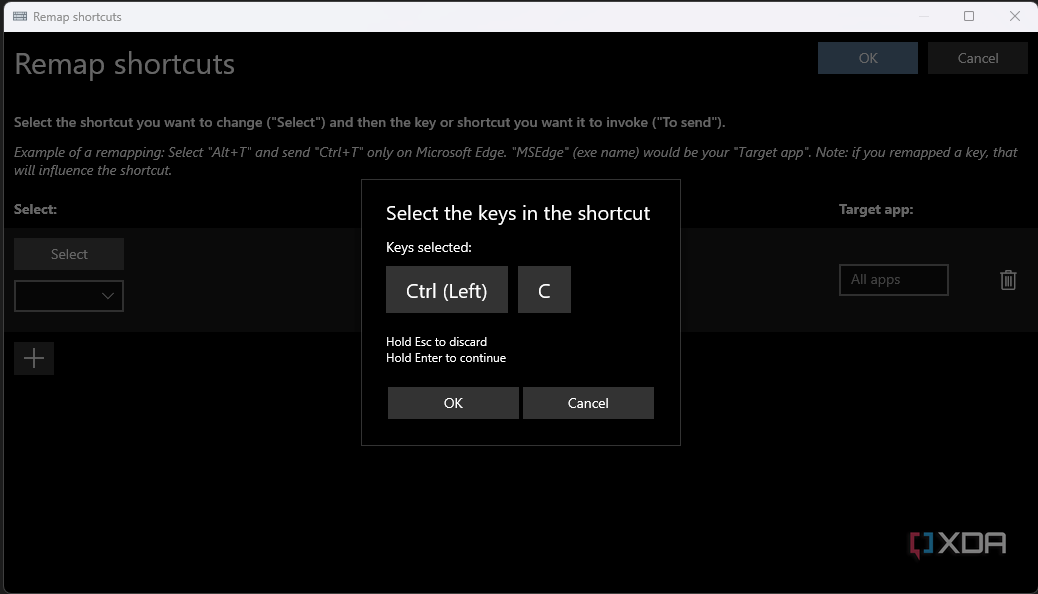
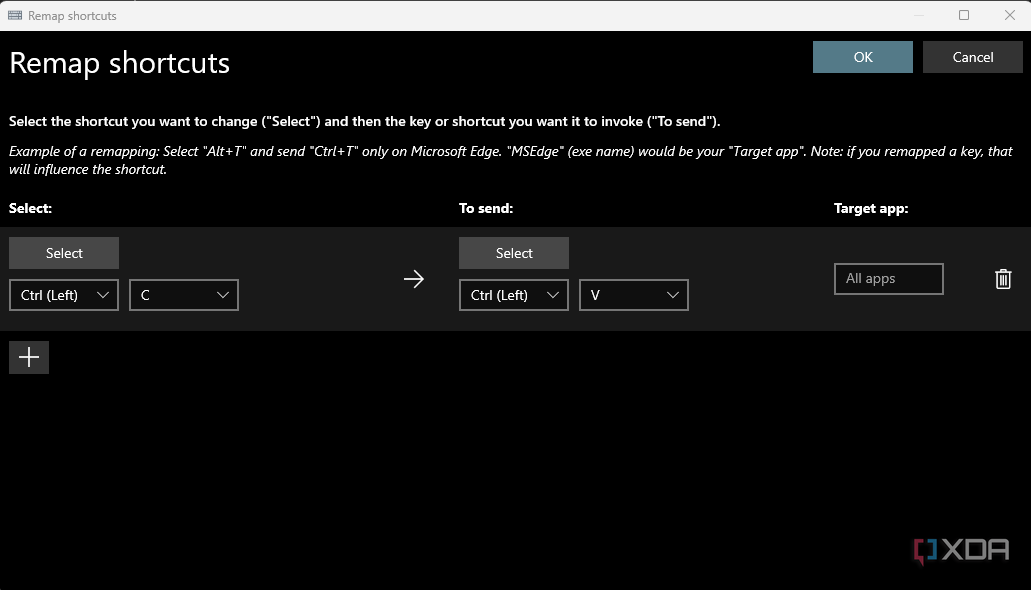
- Using the left-hand side Select button, choose the shortcut to remap. You can hold down multiple keys at once here. I’ve selected Ctrl + C to remap in this example.
- Using the right-hand Select button and enter a shortcut to map onto.
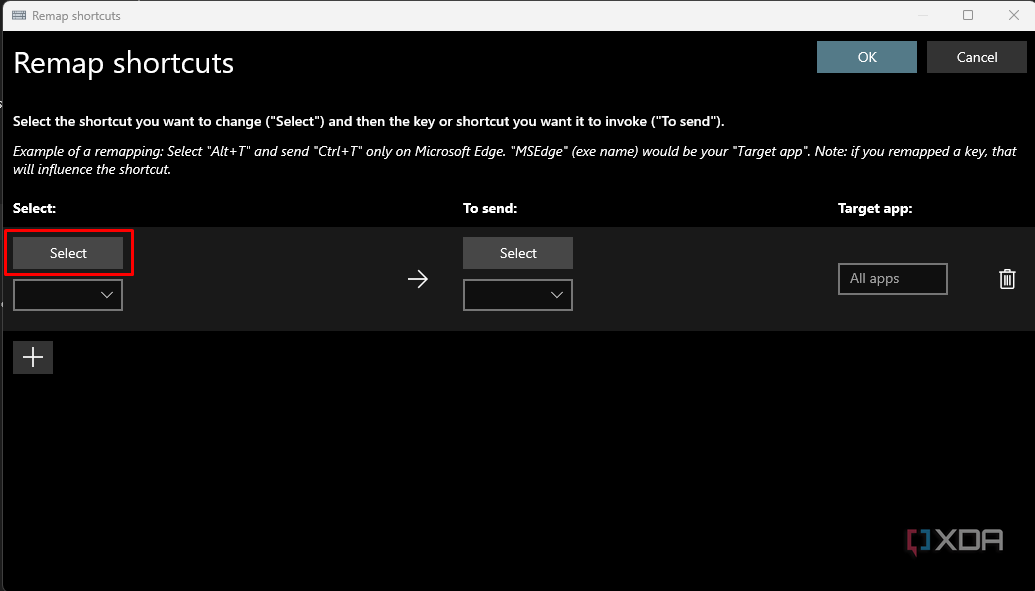
- Optionally, enter the name of an app in the Target App field. This limits the rebinding to a specific application. The rebinding will be global if left blank.
- Select OK to save your selection, and try it out!


How to remove a keybinding
Removing a keybinding is similar to adding one. Here’s how:
- Open PowerToys and select Keyboard Manager in the sidebar.
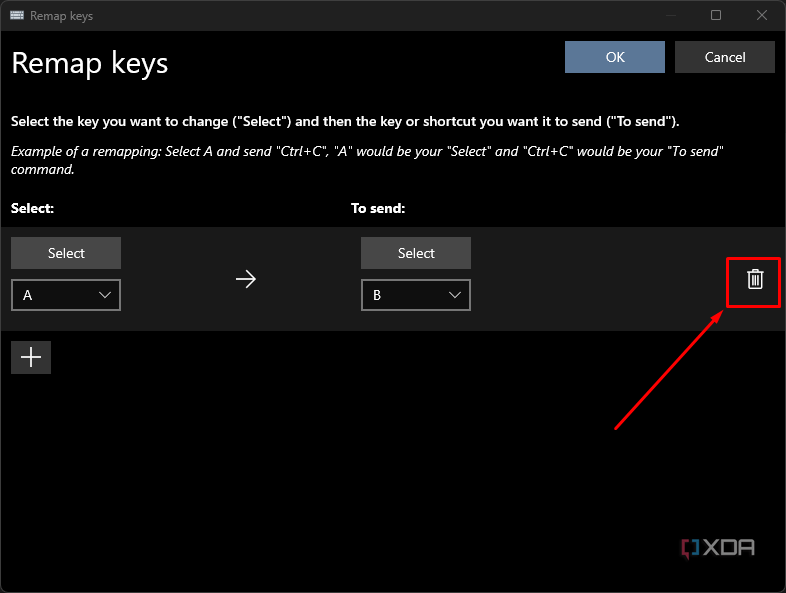
- Select Remap a Key.
- Instead of pressing + (plus) to add a mapping, press the trash can on the right-hand side of your existing keybinding to delete it.
- Click OK to save your changes.

Playing with PowerToys
As we’ve seen, it’s possible to rebind individual keys and keyboard shortcuts with PowerToys. There’s a lot of potential for advanced functionality here, especially rebinding shortcuts in specific applications. There is also no limit on how many keys or shortcuts you can rebind. So get creative and set up some cool macros to streamline your day-to-day workflow.
This just scratches the surface of what’s possible with PowerToys, and Microsoft is updating PowerToys constantly. Early versions of new Windows customization features are also often developed there before making it into the mainstream release of Windows.